• Skip to main content
  • Skip to primary sidebar

Sunny Home Creations

menu icon
go to homepage
  • Family
  • Household
  • Gardening
  • Holidays
    • Email
    • Pinterest
  • subscribe
    search icon
    Homepage link
    • Family
    • Household
    • Gardening
    • Holidays
    • Email
    • Pinterest
  • ×

    November 30, 2018

    DIY Unicorn Notebook ~ Simple & Cute Craft

    Sharing is caring!

    124 shares
    • Share
    • Tweet

    This post may have affiliate links. If you click one of these links and make a purchase, we will be paid a commission at no additional cost to you.

    DIY Unicorn School Supplies Notebook

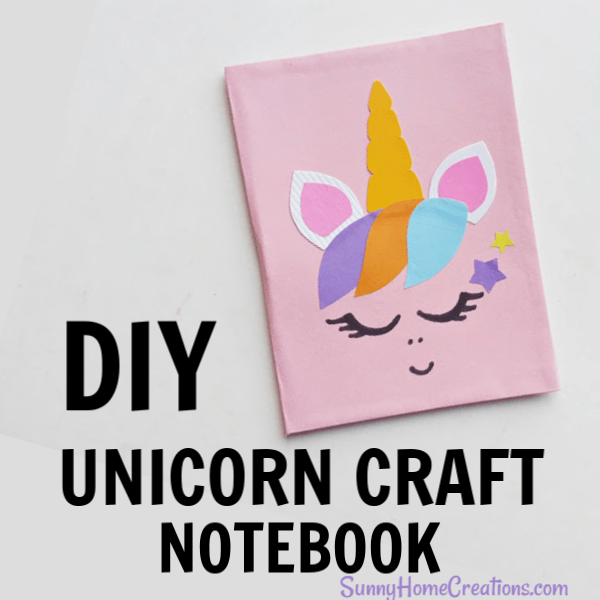
    I am so in love with this notebook!  It is the perfect DIY school supply for any girl (or boy) who loves unicorns!

    It is simple to make and you don’t need any fancy supplies to make it either.

    There are so many ways you can customize this unicorn notebook from drawing in the eyes a different way or using googly eyes to using your favorite colors for the unicorn hair and the cover paper.

    So let’s get to the instruction for making this!

    DIY Unicorn School Supplies Notebook

    DIY Unicorn School Supply Notebook:

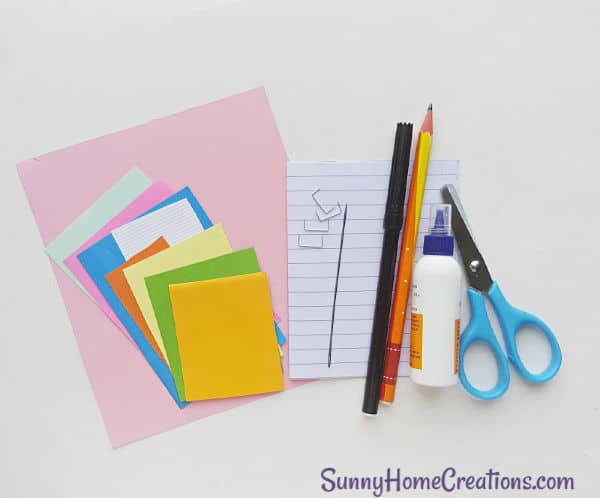
    • Colored craft papers
    • Stationary papers
    • Needle
    • Stapling pin
    • Black marker pen
    • Pencil or pen – for tracing the template
    • Scissors
    • Craft glue or glue stick

    How to Make DIY Unicorn Notebook

    The first thing you need to do is to download my free unicorn notebook template.  This is located in my free resource library.   Print the template and keep it to the side.  You will need it in just a bit.

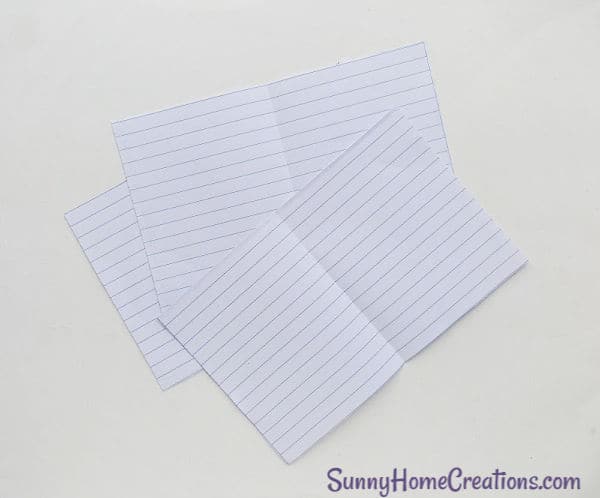
    If you don’t know what size of notebook you want to make, now is the time to figure that out.  You need to measure and cut the stationary papers for the length and width needed.  If you need a size to use, 4″ x 6″ is great.  When cutting out the stationary papers, make sure you cut the length the size you want to use and double the width.  So with the 4″ x 6″ you will cut the paper 6″ for the length and then the width will be 8″.

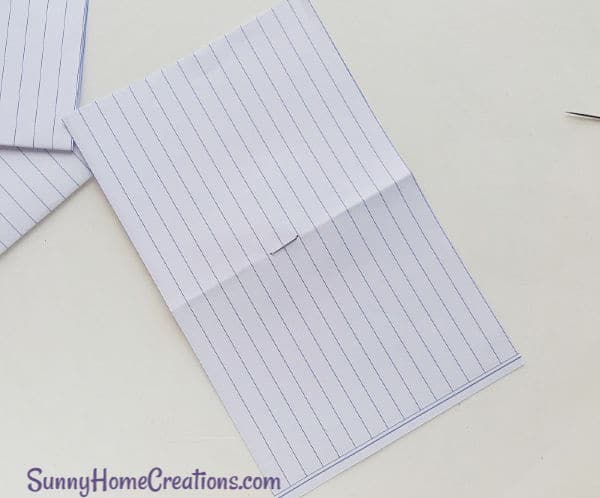
    Next stack 4 of the stationary papers together and fold in half so there is a crease in the middle. Make sure to fold widthwise.

    Papers for DIY Unicorn Notebook

    Now you will want to hold all 4 of the papers together in one hand and use your needle to poke 2 holes, the same distance as the stapling pin length in the middle of the center crease.

    DIY Unicorn Notebook Step 2

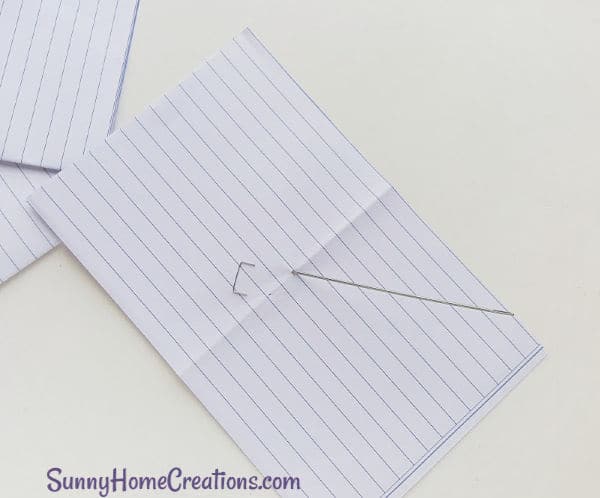
    Now, you will take the stapling pin and you want to go through both of the holes with the pins.

    After poking both holes take a stapling pin and insert the pins on both sides through the holes.

    DIY Unicorn Notebook school supplies Step 3

    Flip the pages and fold in half, flattening the pins with the papers.  Next, do the same prep out a few more bunches of paper.

    DIY Unicorn Notebook school supplies Step 3

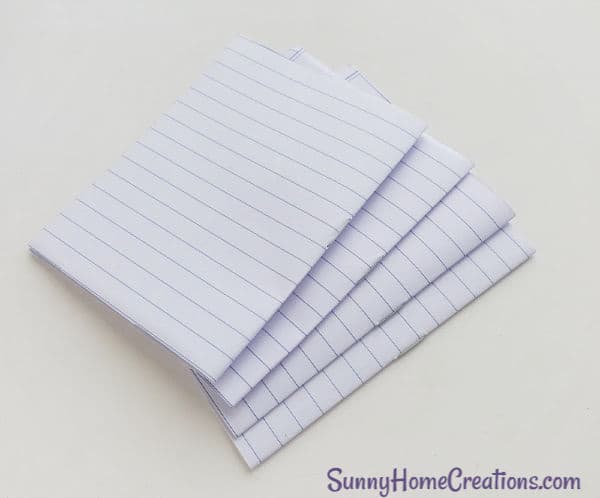
    Next, you are going to make a stack of the stapled papers, making sure they all face the same direction.  Make sure the paper is all lined up as evenly as possible.

    Cut out a piece of paper approximately 2″ x 3″.  If you have a larger notebook then make sure to cut this piece out larger.  Put some glue on one side of the small piece of paper you just cut out.

    DIY Unicorn Notebook school supplies Step 5

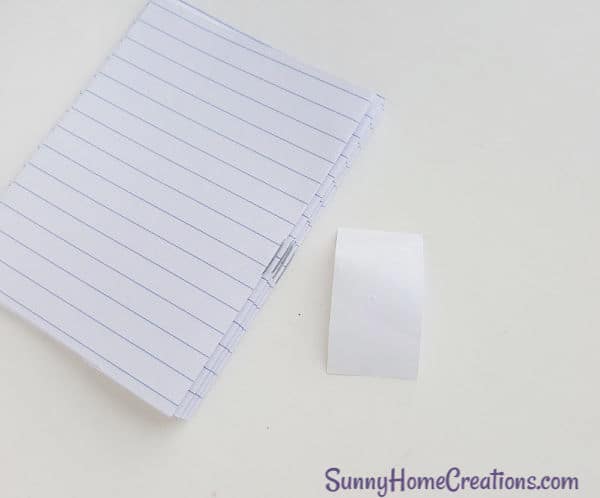
    You are going to use one hand to hold the pile of papers together by their folded end.  Take the paper you just added glue to and you are going to wrap this around the stapled side of the papers.  Now, measure how thick this pile of paper is.

    DIY Unicorn Notebook Step 6

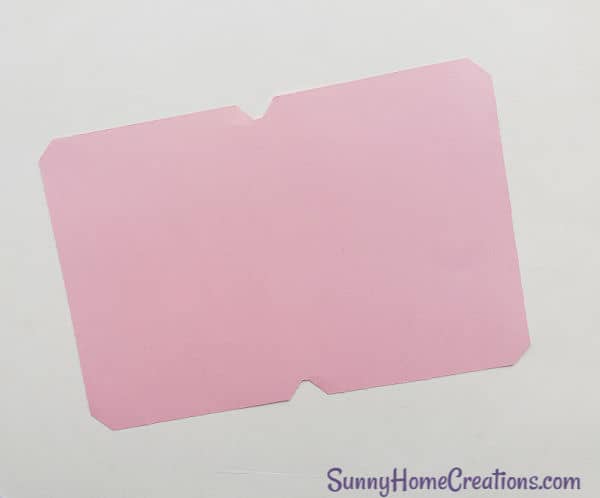
    You are now going to cut the notebook cover out from the piece of cardstock.

    For the length you will add 1 inch.

    For the width you are going to take the measurement you got from the previous step (the thickness of the pile of papers)  add this to the width of your paper and add 1 inch.  So for example, if your thickness is 2″ and your total width is 8″; you will take the 8″ plus the 2″ is 10 and then add on the 1 inch.

    Use these measurements to cut out the cover from your cardstock.

    DIY School Supplies Unicorn Notebook Step 7

    Now you are going to put glue down the center of the cover you cut out in the previous step.

    DIY School Supplies Unicorn Notebook Step 8
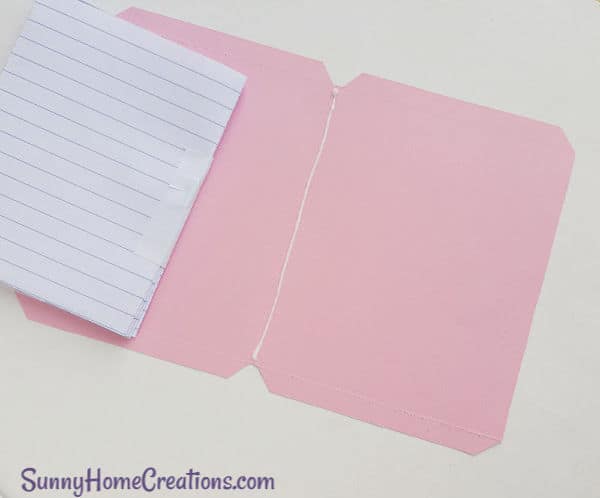
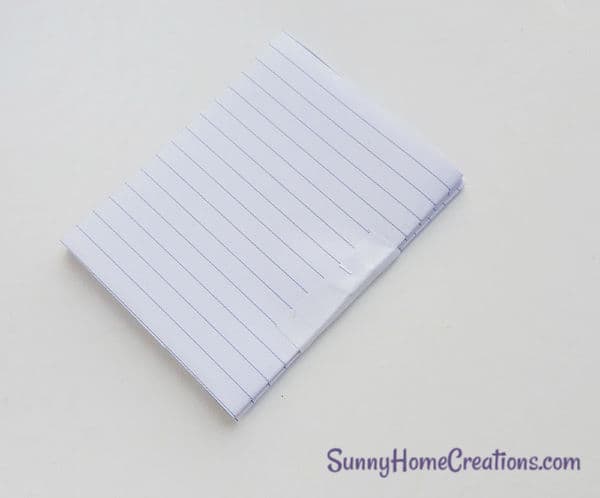
    Now, take the folded end that has the small piece of paper and place it on the glue.  Press is down firmly.  You want to make sure it sticks really well.

    DIY School Supplies Unicorn Notebook Step 9

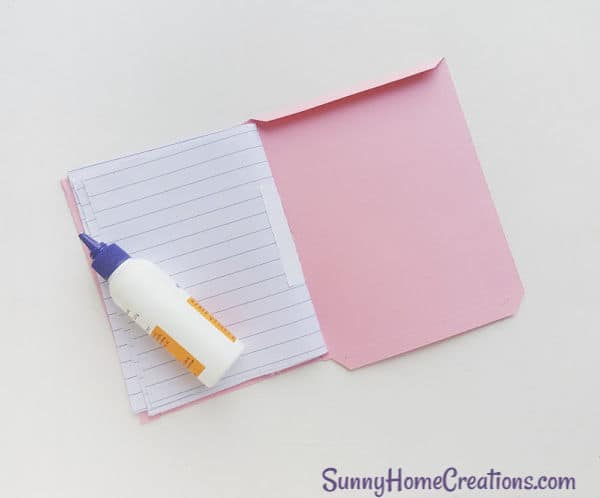
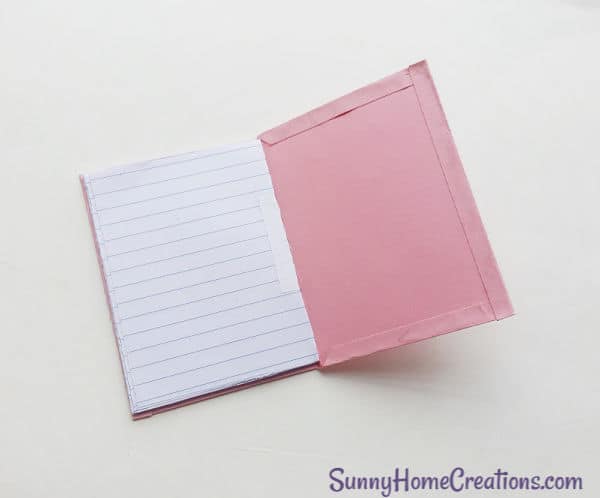
    Fold over the sides of the front cover and glue them down.  Do the same to the back cover.

    DIY School Supplies Unicorn Notebook Step 10

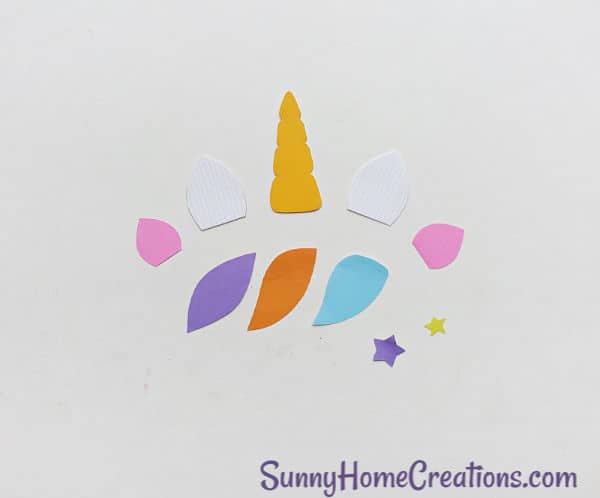
    Now you are going to cut out the unicorn pieces.  You will cut out the template pieces, then trace the template pattern onto the colored paper.  Cut out the unicorn pieces.

    DIY School Supplies Unicorn Notebook Step 11

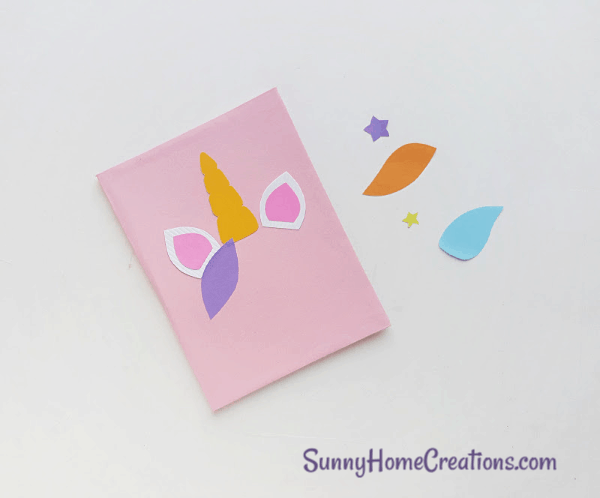
    Lay out the cut out pieces onto the front cover of the notebook.  Make sure the spacing is all correct and then glue down each of the pieces.

    DIY School Supplies Unicorn Notebook Step 12


    Now you are going to use the pencil and draw the unicorn’s eyes, a nose and lips onto the front cover.

    DIY School Supplies Unicorn Notebook Step 13

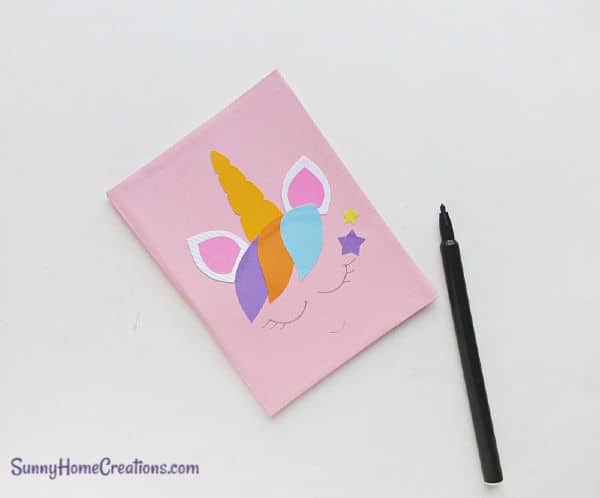
    After you have it how you want it to look with the pencil, take a black pen/marker and trace your pencil marks.

    DIY School Supplies Unicorn Notebook Step 14

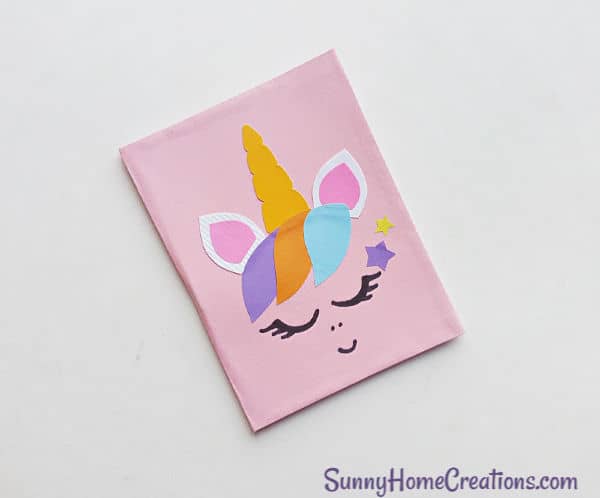
    And that is all there is to it!  You now have a super cute unicorn notebook!

    You can download the template for this here.

    Make sure to pin so you can come back later and make this!

    DIY Unicorn Craft Notebook. Awesome stationary craft for your kids. Simple and fun to create. #craft #unicorn #stationary


    Author

    • Jenny

      Jenny is a homeschooling Mom to 3 active boys. She lives in an old 1915 farmhouse and loves it.

      View all posts

    More Kids

    • New Christmas Tradition ~ Gingerbread Pirates
    • Collage of dinosaur Valentine Cards.
      Dinosaur Valentine Cards ~ Free Printable
    • Collage: top left storage bin with Lego, top right Trofast storage, bottom right toolbox with Legos, bottom left Lego tables with storage.
      Best Lego Storage Ideas for Kids
    • Collage: top left Green perler bead trap, top right rainbow over pot of gold Rolo's, bottom right rainbow leading to cotton balls with gold coins with a box lid propped up, bottom left top hat with rainbow and shamrock on top.
      Leprechaun Trap Ideas

    Sharing is caring!

    124 shares
    • Share
    • Tweet

    Reader Interactions

    Leave a Reply Cancel reply

    Your email address will not be published. Required fields are marked *

    Recipe Rating


    Primary Sidebar

    Welcome, I'm Jenny! I'm a wife and mother to 3 boys. Here you'll find encouragement, gardening tips, organization ideas, fun things to do with your kids and more.

    More about me →

    Valentine's Day

    • Square image collage: top left white jar with "X" and "O" see through letters with candy inside, top right date night conversation cards, bottom right coffee soap, bottom left hos and spicy gift set.
      DIY Valentine Gifts for Him
    • Collage: top left wood frame with 2 images, top right bound deck of cards with "52 Things I Love about you" on the front, bottom right chocolate covered strawberries, bottom left a jar with lavender bath salt.
      DIY Valentine’s Day Gifts for Her
    • Fireplace with Valentine decorations around the mantle and around the fireplace.
      Must Have Valentine Decorations for 2023
    • Man holding a gift in one hand and covering a woman's eyes with the other hand. Woman has hands clasped excitedly.
      Valentine’s Day Gifts for Her

    Latest Content

    • Collage with chick deviled eggs, egg muffins, quiche and hot cross buns.
      Easter Brunch
    • Strawberry Shortcake - the perfect 4th of July dessert
      4th of July Food
    • Amazing DIY Creative Christmas Gifts you have to make this year. These creative DIY gift ideas are awesome! They don't even look homemade!
      34 DIY Christmas Gifts to Make This Year
    • Halloween wreath.
      15 Beautiful Halloween Wreath Ideas for Your Front Door

    Welcome, I'm Jenny! I'm a wife and mother to 3 boys. Here you'll find encouragement, gardening tips, organization ideas, fun things to do with your kids and more.

    More about me →

    Valentine's Day

    • Collage of 4: top left gray wreath with hearts, top right jar with "you are loved" on it, bottom right wood "x" and red burlap covered heart "o", bottom left pink pallet with "our Love" on it.
      DIY Valentine’s Day Decor
    • Woman holding a red heart that says "Happy Valentine's Day".
      Valentine’s Day Gift Ideas for Him
    • Valentine's Day Boxes collage - top left monster box, top right Minecraft creeper box, bottom right red birdhouse box, bottom left Panda Unicorn box.
      Valentine Boxes for School

    Latest Content

    • Collage: top left heart bath bombs, top right mug, bottom right stepping stone, bottom left painted flower pot.
      19 Mother’s Day Gifts
    • easy DIY strawberry tower
      DIY Strawberry Containers and Towers
    • daphne flower.
      11 Best Smelling Plants for Your Yard – Most Fragrant Plants
    • Pin image with the following drinks: green smoothies, boozy leprechaun, green Jello shots, and a frozen grasshopper.
      St. Patrick’s Day Drinks

    Footer

    ↑ back to top

    ABOUT | CONTACT | TERMS & CONDITIONS | DISCLAIMER | PRIVACY POLICY

    As an Amazon Associate, I earn from qualifying purchases.

    Copyright © 2023 Sunny Home Creations on the Brunch Pro Theme